Archive for March 2013

Saturday, March 30, 2013

shindigz party supplies {giveaway!}

***THIS GIVEAWAY IS NOW CLOSED***
The winner is 
Little Ella Lu
Congrats! I have passed your email onto the sponsor so keep an eye out for their email!
-----------------------------------------------------------------------------------------------------------------------

I love when I find a great party supply store. Shindigz is just that. Buy over 34,000 online party supplies, party tableware, party favors, decorations, and more! They also have really great products that can be personalized for any party!


I also love all the party ideas and kits that Shindigz has. Planning a party is a lot of work and I love when a lot of the thinking and planning is simplified by an easy kit that has everything you need!

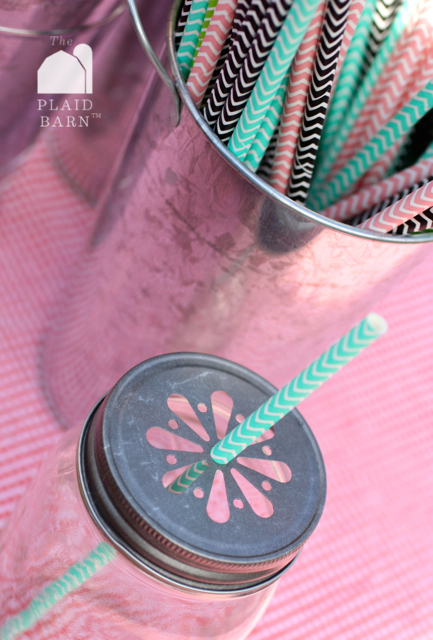
I recently received some fabulous party supplies from Shindigz--just in time for Easter! I love all the supplies!


I especially love this Easter banner. I could have customized it any way I wanted! I chose a simple Happy Easter, but for a different occasion a banner with a birthday boy or girls name would be really fun.
Shindigz has everything you need for any occasion/party. You really just need to check them out! I was so pleased with the fast shipment of my supplies and I think the products are high quality.

Today, Shindigz is offering one of our readers the chance to win a $50 gift certificate to the site! To enter, visit Shindigz and look around. Find an item or theme you would love to try and then come back and leave a comment with what that is. For a second entry you can share about this giveaway on Facebook or Twitter (leave a link in the comments!). This giveaway will end on Thursday, April 4th at 11:59pm PT. Good luck!

share this on »
{Facebook} {Twitter} {Pinterest}
41 Comments

Friday, March 29, 2013

plaid barn giveaway

The Plaid Barn is a fabulous site that has daily deals on craft supplies, diy kits and more! I love it because craft supplies can get expensive, but with daily deals from The Plaid Barn, I can stock up on the supplies I need for much less!

Each weekday (Monday-Friday) starting at 8am EST, there will be an awesome item and an amazing price, but there will only be a limited number available! So you want to make sure you sign up for the emails! If you go to The Plaid Barn and enter your email address then the daily deals will start coming to your inbox. You don't want to miss anything; look what they have for a deal today...


These adorable daisy lids are just $3.99 for a set of 6! How perfect are these for summer picnics and BBQs? Your guests will love them!


There have been so many fabulous deals lately, take a peak at some examples of things you could snag over at The Plaid Barn each day.


Today, The Plaid Barn is giving one of our readers the chance to win a $50 goodie box filled with various items from their site. Follow the rafflecopter link below to enter!

a Rafflecopter giveaway

share this on »
{Facebook} {Twitter} {Pinterest}
8 Comments

Wednesday, March 27, 2013

wrapping paper & ribbon organizer {video tutorial for joann fabrics & crafts}


I hate public speaking. HATE it. In fact I told my husband we can never move again because every time we move they ask us to speak in church. Which turns out to be 15 minutes of me bawling and blowing snot bubbles from the pulpit while everyone in the congregation looks on, horrified. So imagine my dread when I was asked to be on camera not once but TWICE in the same week. And I presume I was supposed to be excited to be asked. I was honored, but not happy. Terrified. Mortified. The very thought of my speaking in front of a camera makes my stomach churn. But I'm also a people pleaser and I have an extremely difficult time turning down anything that has to do with crafting, so as a result here is video one of two (two will be seen on mycraftchannel.com sometime next month).


This is a video I made for JoAnn Fabrics' YouTube campaign to promote Creativity Made Simple. I made this wrapping paper and ribbon organizer for my craft room (which is currently under construction). I think it will look nice on my wall and get some of my supplies out of the closet. Several other craft bloggers have also teamed up with JoAnn to show you simple but creative projects on JoAnn's YouTube channel, so check them out, too. Oh yeah, and the blogger with the most video views will win a $100 JoAnn gift card for their self AND for one of their readers! So watch it for a chance to win, but don't judge. My awkwardness is hard to watch, but hopefully the information is helpful. Hey, I never said I was a movie star!

Wrapping Paper & Ribbon Organizer Tutorial
Thanks for watching! Here's a 40% coupon for JoAnn for you to use through the end of the month. Enjoy!

share this on »
{Facebook} {Twitter} {Pinterest}
4 Comments

Thursday, March 21, 2013

brighthouse baubles giveaway

***THIS GIVEAWAY IS NOW CLOSED***
The winner is...
Grace Inman
Congrats! We have passed your email onto our sponsor, so be on the lookout for more info!


Happy Spring! This time of year I always love seeing all the buds coming up out of the ground and look forward to pulling out my bright colors to wear!


Brighthouse Baubles is a great shop that offers bright, beautiful, and affordable fashion jewelry which makes the perfect addition to any wardrobe! All items are priced under $50 and there is always FREE shipping within the USA!

Take a look at some of these fabulous designs...

So many items to love!! Today, Brighthouse Baubles is giving one of our readers the chance to win any item of their choice from the store! To enter, visit the Brighthouse Baubles store and find your favorite item, then leave a comment with what that is. For a second entry visit the Brighthouse Baubles blog and become a follower. For a third entry, like Brighthouse Baubles on Facebook. This giveaway will end on Tuesday, March 26th at 11:59pm PT.

SPECIAL OFFER: Brighthouse Baubles is giving our readers 30% off any order through Friday, March 29th! Just use the code LITTLEBIRDIE.

share this on »
{Facebook} {Twitter} {Pinterest}
60 Comments

Wednesday, March 20, 2013

lilly lou finds {sponsor spotlight}

We are excited to introduce you to our newest sponsor, Lilly Lou Finds! We love highlighting great sites and new companies, and Lilly Lou Finds is no exception.


Lilly Lou Finds is a brand new online market bringing you daily deals on amazing finds! It's a refreshing and bright virtual spot to find shopping opportunities on fabulous jewelry, striking apparel for women and kids, party decor, chalkboard accessories and much more! All at discount prices too good to pass up. The calendar is already full with these amazing finds and more. They only last a few days so you won't want to miss out!

Make sure to sign up for the newsletter to receive more information about the Grand Opening! The early spring launch is just around the corner and sure to be spectacular! Look for Lilly Lou Finds on Instagram, follow on Pinterest and like them on Facebook so you won't miss out on anything.

share this on »
{Facebook} {Twitter} {Pinterest}
2 Comments

Monday, March 18, 2013

changeable picture frame {cre8time project}

I've had so much fun adding more creativity to my life with my CRE8TIME challenge!


Thanks to a challenge from Michaels who joined the CRE8TIME movement, I have been having fun making cards, journals, and this changeable picture frame. You are going to love this simple project. You can make several of them in a day and they make great gifts!


Find a picture frame that you love, or re-purpose one that you don't like! You can even make one yourself if you are feeling extra creative. I went with an 8x10 frame, but you can choose whatever size you like depending on what you will clip onto the frame.

I spray painted this frame yellow...we all know it is one of my favorite colors!

Then find a piece of patterned paper that you love and insert it into the frame (once it is dry if you have painted it of course!)  The great thing is that you can continuously change out the paper as often as you like. This is perfect for me, because I always want an easy way to switch up my decor. I have so much patterned paper; I will never get sick of what is in the frame!


After you have your frame and paper all ready to go, you need a bulldog clip and some E6000 glue (or super glue, or hot glue if you prefer). Glue your bulldog clip towards the top center part of the glass on your frame.


Press it firmly on the glass and allow it to dry completely. Make sure you use a good amount of glue so that the clip will stay adhered to the glass.

Now, here's the cool part.
You can clip anything you want onto this frame! I love this concept because I am constantly taking updated photos of my boys and I like to change them often. Sometimes I want to change out pictures to look at something different for a while. The boys really enjoy seeing the new pictures getting clipped onto the frame.

You can also use the frame for love notes! I have put my frame on the counter in the morning where I know my husband will see it before he leaves for work...


I've even used it for leaving messages, when I want to be sure my family will see them!


That's what I love so much about this! You can completely customize it for you...make several of them in different colors, change out your patterned papers, make several different sized frames, and clip on whatever you want! So, get creative. That's the whole goal of CRE8TIME anyway, right? Carve some time out of your day and create. You know you want to.

share this on »
{Facebook} {Twitter} {Pinterest}
1 Comment

Tuesday, March 12, 2013

Reading Month with LeapFrog {& a giveaway!}

***THIS GIVEAWAY IS NOW CLOSED***
The winner is:
jenmalonee
Congrats! Check your email inbox for the details on your win!

As parents, we know that reading with and to our children is extremely important. I have always known that reading was important- in my own life and in the lives of my children- but now that my boys are in school, I see what a push there is from the teachers to read to them every day! I think it is an integral part of any good curriculum plan. Reading is not important only as its own subject, but it really helps in all other aspects of education as well! There is no way I could have succeeded in my college courses if I had not been a strong reader.

Studies show that the more children read, the better readers they become. In one study, children who read 20 or more minutes per day scored in or above the 90th percentile; those who read less than 10 minutes scored below the 75th percentile. I am so grateful that the school my children attend, pay such attention to this. They have a program each year where the kids get a chart and if they read 20 minutes per day at the end of the month they get a prize. It has really helped to draw my attention to how much reading we do.

In honor of Reading Month, LeapFrog is donating $2 million of books to America’s schools, and you can help! Go to Facebook and share the “Read 20 Minutes a Day”pledge, and LeapFrog will donate 5 books for every pledge! Also be sure to visit LeapFrog's Reading Month page where you can get all sorts of tips, videos, activities, and printables to help your own children get engaged in reading! It is such an important part of our children's learning and we all need to get involved and get kids reading each day.


LeapFrog is offering special deals on reading products all through March, in honor of Reading Month, including $3 off of Tag and Tag Junior books. Here’s the link to print/redeem this offer.

I love the Tag products. My son loves using them and I love that he can just tap the pen onto a word and he can learn what it is! It really helps him learn new words and helps him become a stronger reader.

LeapFrog is offering a giveaway of one Leapfrog prize pack ($50 approximate value) to one of our U.S. readers! Leave a comment on this post letting us know what you do to incorporate reading into your children's day/routine. For a second entry, you can share this giveaway on Twitter or Facebook (leave us a link!). This giveaway will end on March 21st, at 11:59pm PT.

I was selected for this opportunity by Clever Girls Collective but content and opinions expressed here are my own. To take the LeapFrog Reading Month pledge, please visit their Facebook page.

share this on »
{Facebook} {Twitter} {Pinterest}
63 Comments

Sunday, March 10, 2013

spring decor idea {easter wreaths}

I finally got a little hope this weekend that Spring might actually be coming! I ran 6 miles on the trail (instead of on the treadmill) and it was glorious. I am so ready to get outside again!

I told you at Valentine's that my chairs looked naked after the Christmas wreaths were off the backs of my bar stools, so when I bought my Valentine's wreaths I also picked up these spring wreaths to use for the Easter season. (Please try not to notice the piles of mail, etc. on the counter--I was too lazy to clean it up!) They make my kitchen feel so much sunnier!


I was determined to use a ribbon I had on hand (I have a bit of a ribbon hoarding problem), so I picked this green and white gingham. I wanted pink, but it just didn't feel right with my other decor. The green is a nice pop of spring, I think.


Adding a wreath to the backs of dining chairs or bar stools is such a quick and easy way to decorate for the seasons. These make me smile every time I walk into the kitchen!

share this on »
{Facebook} {Twitter} {Pinterest}
3 Comments

Saturday, March 9, 2013

spring table centerpiece idea {and a silhouette double-sided adhesive banner}

I am still relatively furniture-less (why am I so indecisive?), so I have been relying on my kitchen table to satisfy my need to decorate with seasonal tablescapes. (Love that word, by the way, if it really is a word. Sometimes I make things up.) Anyway, here are a few ideas to get your creative "tablescaping" juices flowing (now I know I made that word up).

Instead of a tablecloth, which might have fought with the display, I used a long piece of kraft wrapping paper as a table runner. This is one of my favorite ways to dress up a tablescape because it doesn't matter if it gets dirty, and it's waaay cheaper than a good tablecloth!

Next, pull out all those apothecary jars you have left over from that candy centerpiece you did for your last birthday party or shower. I love using these for every season--just fill it with something colorful or symbolic of the time of year. Depending on how many you have, that could be your centerpiece right there. I filled this one with Robin Eggs candy. Dangerous, I know, but so colorful and cute!

I "filled" this apothecary jar with a decorative bird's nest with the sweetest blue robins eggs in it (non-candy variety). I stacked it on a few books to give it some height.

I loved this darling tin tub with burlap and "No. 4" stenciled on it. I found it at Taipan Trading in Utah, but you could easily reproduce it with a tub of your own, a small piece of burlap, a stencil, and a black Sharpe marker! I filled it with faux potted tulips (I added a few more after this photo because it was looking a bit bare, but you get the idea).

I also added a couple of other fresh-looking spring pieces (more silk flowers, a ceramic bird, and a moss-covered bunny), then anchored it with a green wreath in the center. After I had it all put together, I thought the wreath looked a little bare, and I also wanted to make it more of an Easter display rather than simply Spring, so I added an Easter bunting featuring the words "He Is Risen". Here's how to make one:

Cut the pennants out of book pages either by hand or with a die cut machine (I used my Silhouette SD). Next cut the letters out of double-sided adhesive paper (mine is from Silhouette). See this tutorial for more into on this great stuff! Then add silver German glitter glass to the adhesive letters and hang the pennants on some baker's twine.

And, since I"m completely incapable of simplicity, I added a few embellishments, like yellow pom-pom trim. . .
 . . .and little paper flowers from Bazzill. But that is entirely up to you and how crazy you personally are.
Ta-da!

Then I hung it on my wreath.

My poor family is getting used to eating at the table but not being able to see each other over the various vases and floral arrangements I've been covering the kitchen table with. I'm just too lazy to move it. Plus it just makes me so happy to look at my little piece of Spring while this winter drags on!

share this on »
{Facebook} {Twitter} {Pinterest}
Add a comment

Friday, March 8, 2013

cre8time project {with Michaels}

Have you heard of the CRE8TIME Campaign? The Craft and Hobby Association recently launched its new campaign CRE8TIME, dedicated to reclaiming your creativity, and Michaels is joining the movement. 


CRE8TIME is a movement, a movement supported by a group of people who want to make a positive social change. As our lives become increasingly crowded with “responsibilities,” we tend to ignore ourselves and find it difficult to justify creative pursuits; they seem “selfish” and are often the first things we discard. It’s time to reclaim our creativity! It is designed to help people recover eight hours a month and devote it to their particular craft, and to create a place for them to share their experiences – the joys, lessons, and results – with the creative community at large.

So, with a challenge from Michaels,  I am reclaiming my creativity and challenging myself to find more time to create. It doesn't have to be some major project and there doesn't have to be a bunch of pressure on myself to do it perfectly but just to carve out more time to create some things I love! One of the first things on my list is to make a bunch of cards. My handmade card stash is seriously dwindling and I need to re-stock! Here are some cards I plan on using as inspiration...


I also went to Michaels and bought a bunch of supplies to get another craft project started....


You will get to see the full project next week after I have finished. Creating really is an important part of my life and there is something special about spending some time after my boys are in bed to lose my mind in a project that fulfills me. I feel more relaxed and happy as a I create and that quiet time to clear my head is so necessary. I hope you will be able to carve out some time in your day to reclaim your creativity as well!

share this on »
{Facebook} {Twitter} {Pinterest}
1 Comment

Thursday, March 7, 2013

silhouette double-sided adhesive paper {tutorial}

Last weekend I attended a fabulous craft retreat called "An Artsy Weekend" with a very dear friend. It was food for my creative soul. It stretched me and inspired me and I learned a few new tricks. Like how to make goat cheese. And how not to stamp letters backwards in leather (sometimes I learn better by experience). Plus I got to hang with some fabulous people you may know like Rhonna Farrer, Margie Romney-Aslett, Jen from Tatertots and Jello, Tausha of Sassy Style Redesign, Shelley from The House of Smiths, Becki from Whippycake, and other fabulous bloggers, artists, and teachers. It was all put together by the darling Marci Welker of Fallow Field Farm, and yes, I hear she will be doing more of these intimate crafting weekends in the near future! I'll be sure to let you know.


Before the retreat we were asked to make ourselves a name tag. I had just received a pack of Silhouette's Double-Sided Adhesive paper in the mail, so I decided to find a way to use it on mine.

If you haven't used this stuff before, be prepared to get glittery. It is hands down the easiest (and least messy) way to adhere glitter, and the best part is that you can use your Silhouette images to cut custom shapes out of it! I wanted my name to stand out, but instead of glitter I ended up going with these silver micro beads. Here's how:

1. Cut your shape with your Silhouette (or any die cut machine) out of the double-sided adhesive paper.

 
2. My design did not cut completely through (time for a new blade), but I was glad. With most designs, you would simply remove the yellow backing and place your shape in place. But was hoping to keep the letters of my name spaced and in line, so the fact that they were still connected worked for me! Either way, remove the yellow backing and place where you want your design.
 

3. Peel the white paper off the front of the shape. In my case, I pressed down on the letters a little and weeded the outside and inside of letters out, leaving the letters of my name centered and in line. Woo hoo!

4. Pour your micro beads or glitter (or flocking or what-have-you) on your image. Press down over image to ensure it sticks well. Dump off the excess and there you are--covered in bling.


I did lose a few beads over the course of the weekend, but all-in-all I was surprised at how well they held on to the adhesive!

For more images of our artsy weekend projects and fun, follow me on Instagram (ID: sybrowsky) and check out #anartsyweekend.

share this on »
{Facebook} {Twitter} {Pinterest}
2 Comments
LinkWithin Related Stories Widget for Blogs